
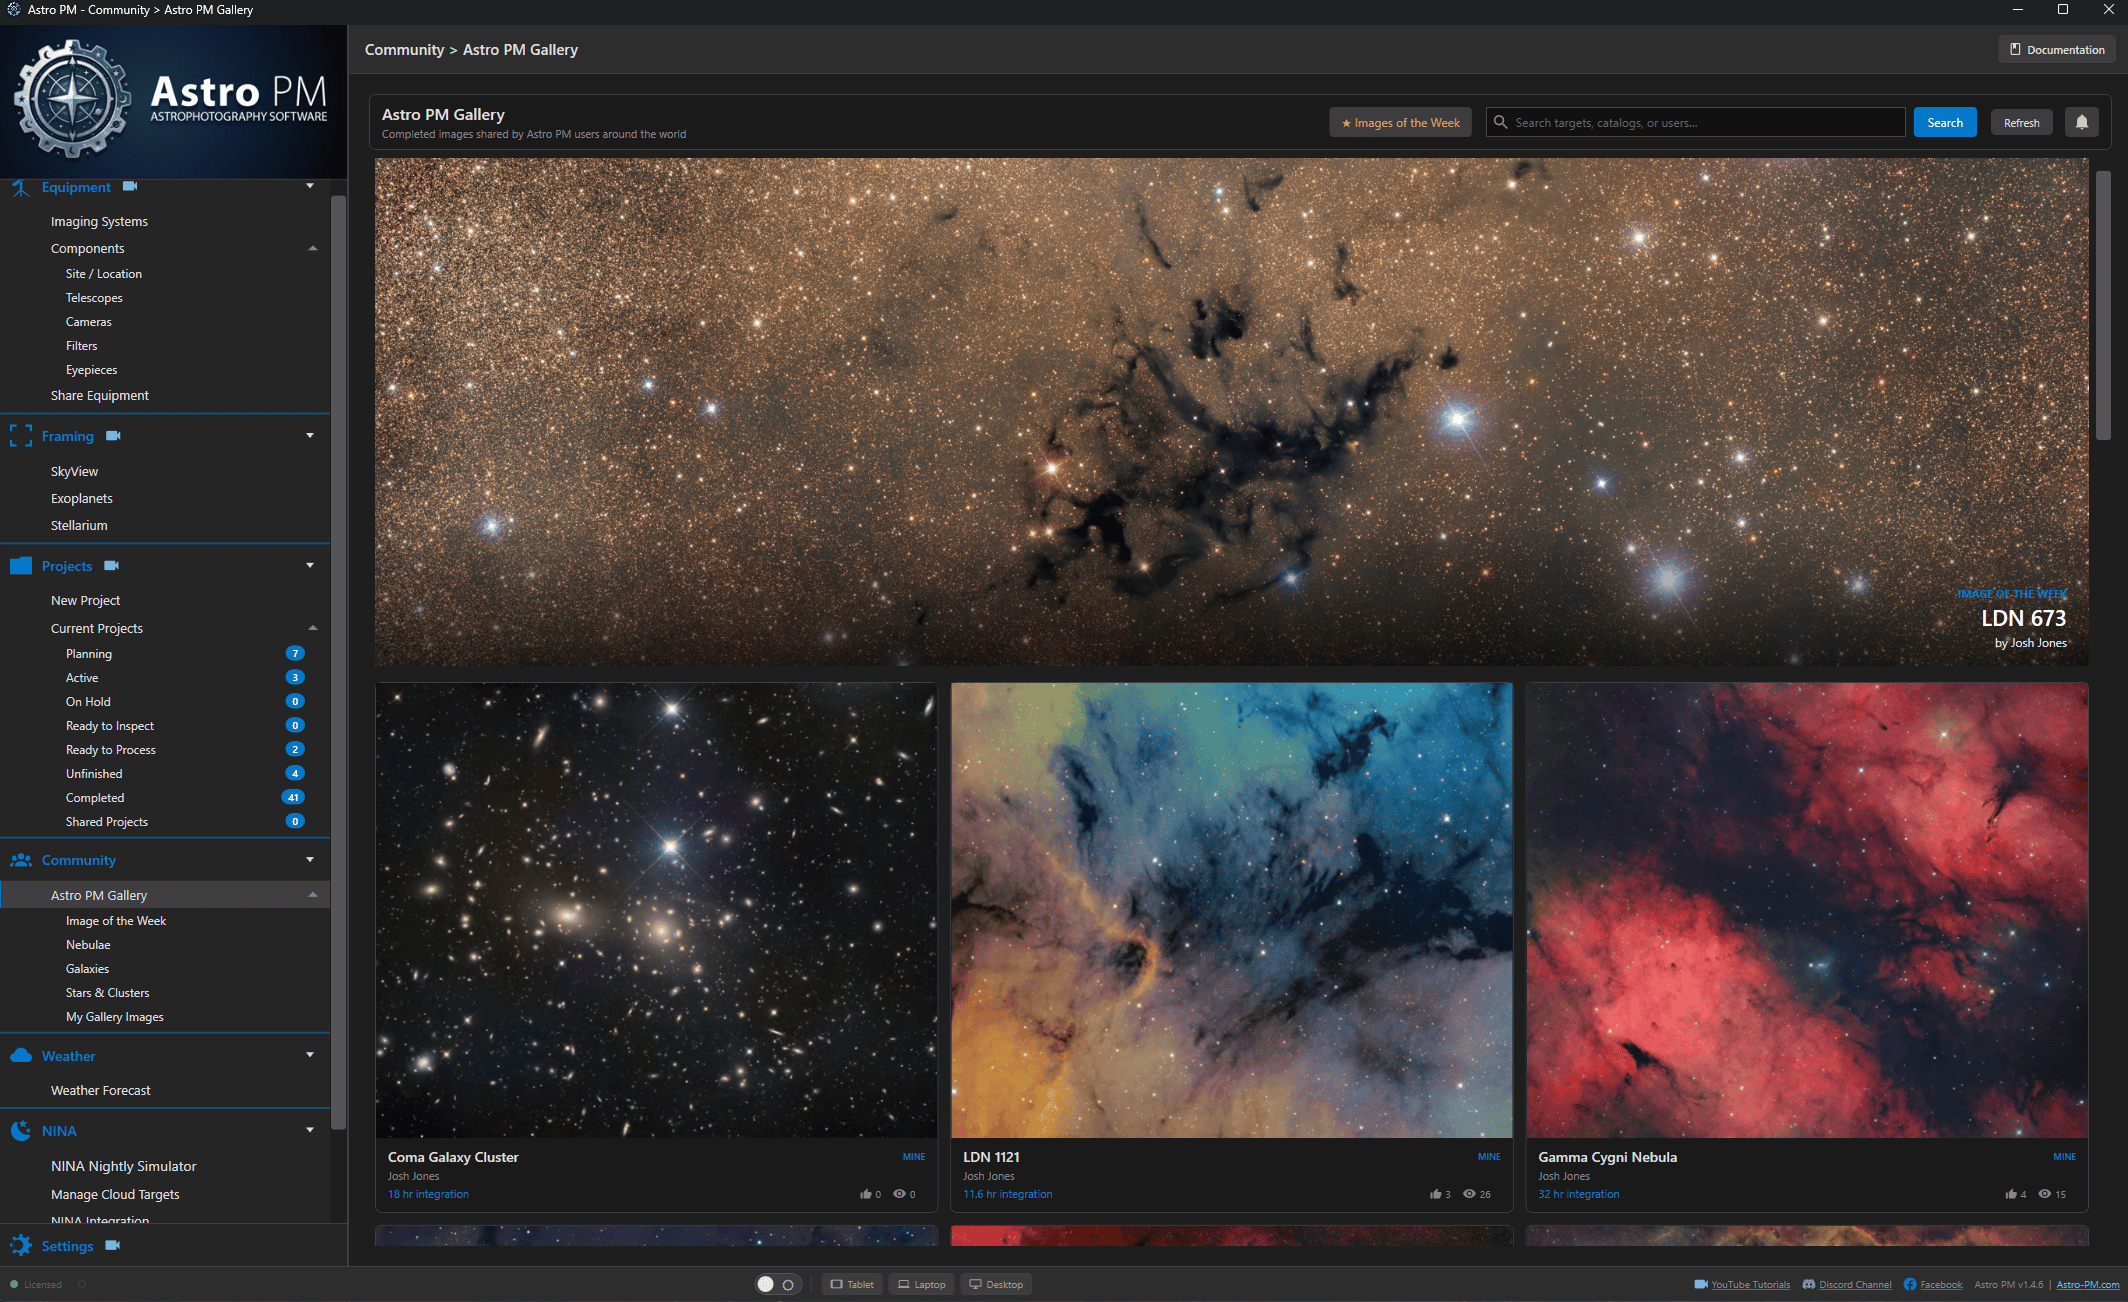
One image at a time is chosen as the Image of the Week and given the top of the gallery: a full-width banner above every other tile, with the target name and photographer over the picture. It is the gallery’s way of putting one piece of work in front of everyone who opens the Community section.
Currently the SPIRIT of Astro PM is not to make competition out of our Astronomy Gallery. Therefore, you will see your likes and such on your own images, but others will not. That way the gallery is kept neutral, leave comments as you like, give thumbs up to the user, but it’s not in the spirit of our gallery to make it a competition.
The Banner #
The banner sits above the grid on the main Astro PM Gallery view, showing the current pick at full width. Click it and the usual image detail opens – the same metadata, exposure table, likes, and comments as any other image.
The featured image is lifted out of the grid below so it is never shown twice, and it always appears regardless of how far down the gallery it would otherwise sit.
The Collection #
Past picks are kept. Open Community → Astro PM Gallery → Image of the Week, or use the orange ★ Images of the Week button in the gallery toolbar, to browse every image that has ever held the slot, most recent first.
Because the honour is permanent, an image that was once Image of the Week stays in that collection when the next pick takes over the banner – the collection grows into a gallery of the community’s best work.
How Images Are Chosen #
Picks are made by the Astro PM team from everything submitted to the gallery. There is no entry step and no nomination – every image in the gallery is automatically eligible. Likes and views are part of what gets looked at, but they are not the whole story: a beautifully processed rare target with a handful of views can absolutely take the slot over a popular one.
Giving Your Image Its Best Chance #
- Submit the good version. The original file is stored at full resolution and is what gets looked at closely – upload the finished master rather than a quick export.
- Fill in the details. The acquisition data is half of what makes a gallery image interesting. Complete filter breakdowns, honest integration time, and a description of what was difficult all add to it.
- Write something about it. The description field takes formatted text – a few sentences about the target, the conditions, or the processing choices give the image context.
- Do not forget older work. Anything with a final image on a saved project can be submitted, however long ago it was captured.